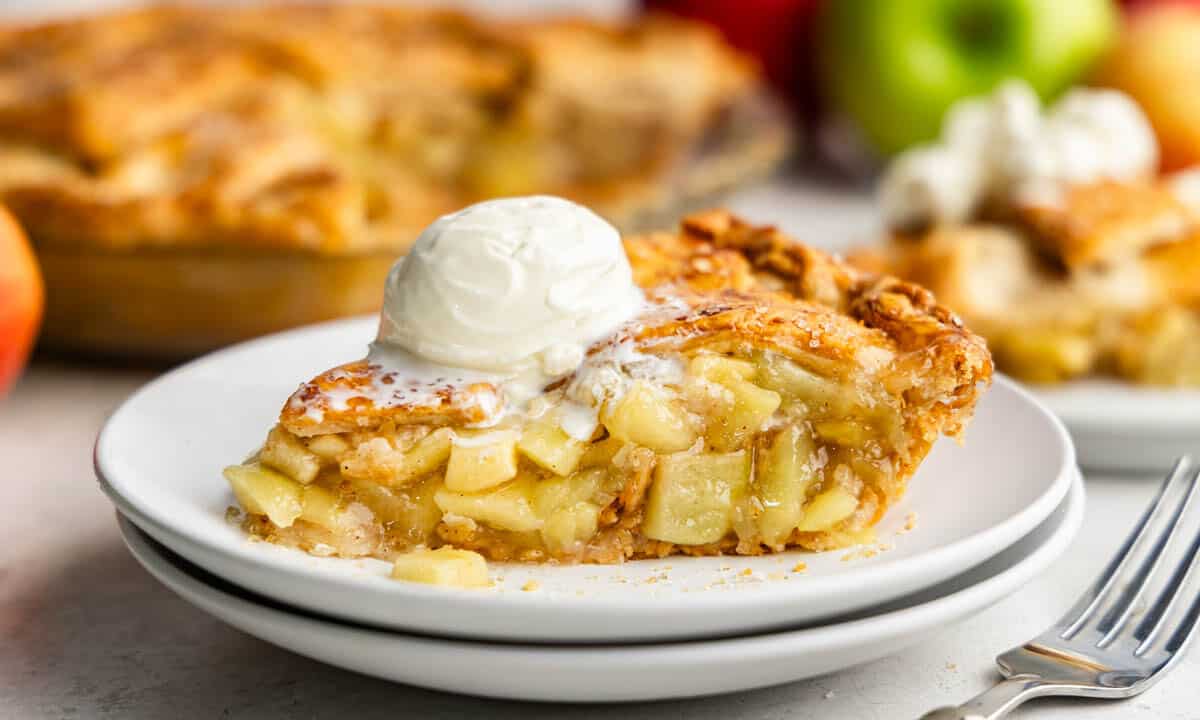
There’s nothing quite like the smell of a homemade apple pie baking in the oven. It’s a dessert that will have you waiting with anticipation for that first bite. Whether you’re aiming to impress guests at a holiday dinner or just want to treat your family to something special, making an apple pie from scratch is a surefire way to please. Plus, it’s a lot easier than you might think! With a mix of sweet and tart apples tucked into a flaky crust, this pie is about to become a new favorite in your home.
Apples sure make for a delicious dessert, whether it’s in pie, crumbles, crisps, or cobblers, you’re going to love it!
Why You’ll Love This Recipe
- Beginner-friendly and accessible for bakers of all skill levels.
- Includes a detailed breakdown of which apples are best to use.
- Delicious caramel apple variation so you can easily level up your pie.
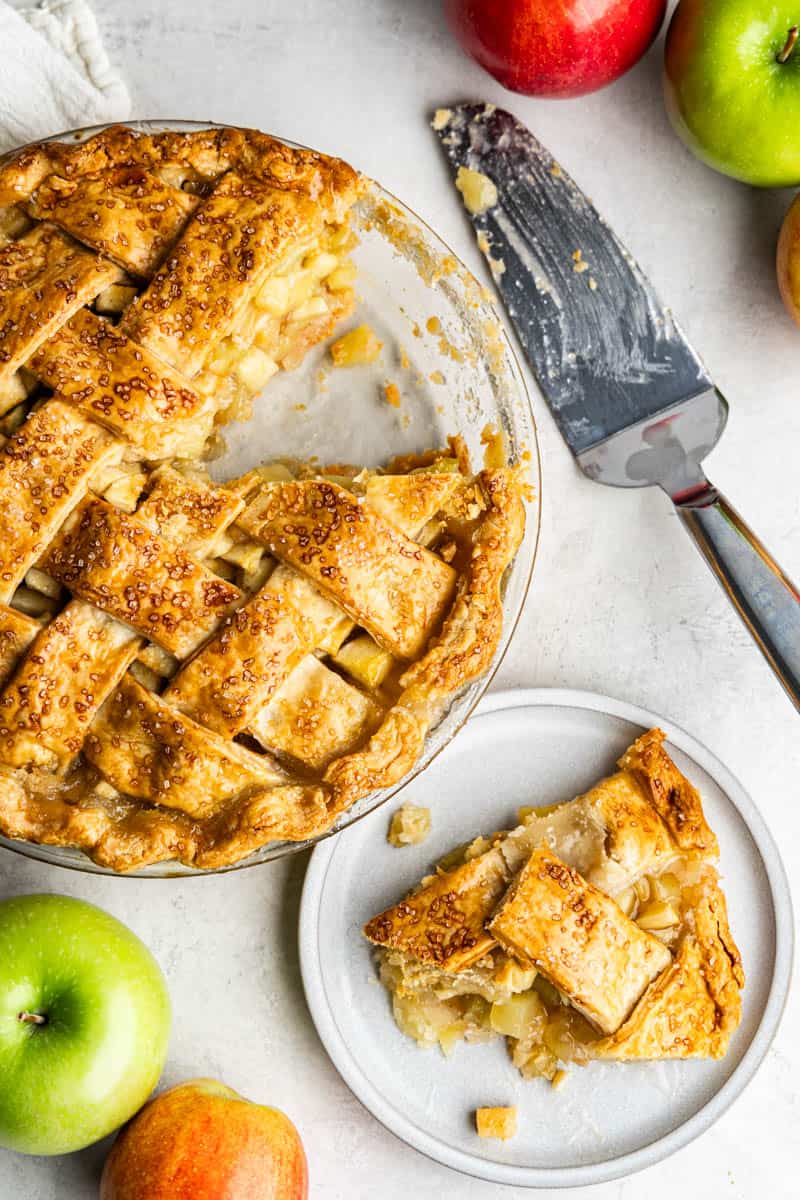
Apple Pie Recipe
When it comes to baking the perfect apple pie, selecting the right apples is crucial. The ideal apples for pie are those that offer a balance of sweet and tart flavors and retain their structure during baking, preventing the pie from becoming too mushy.
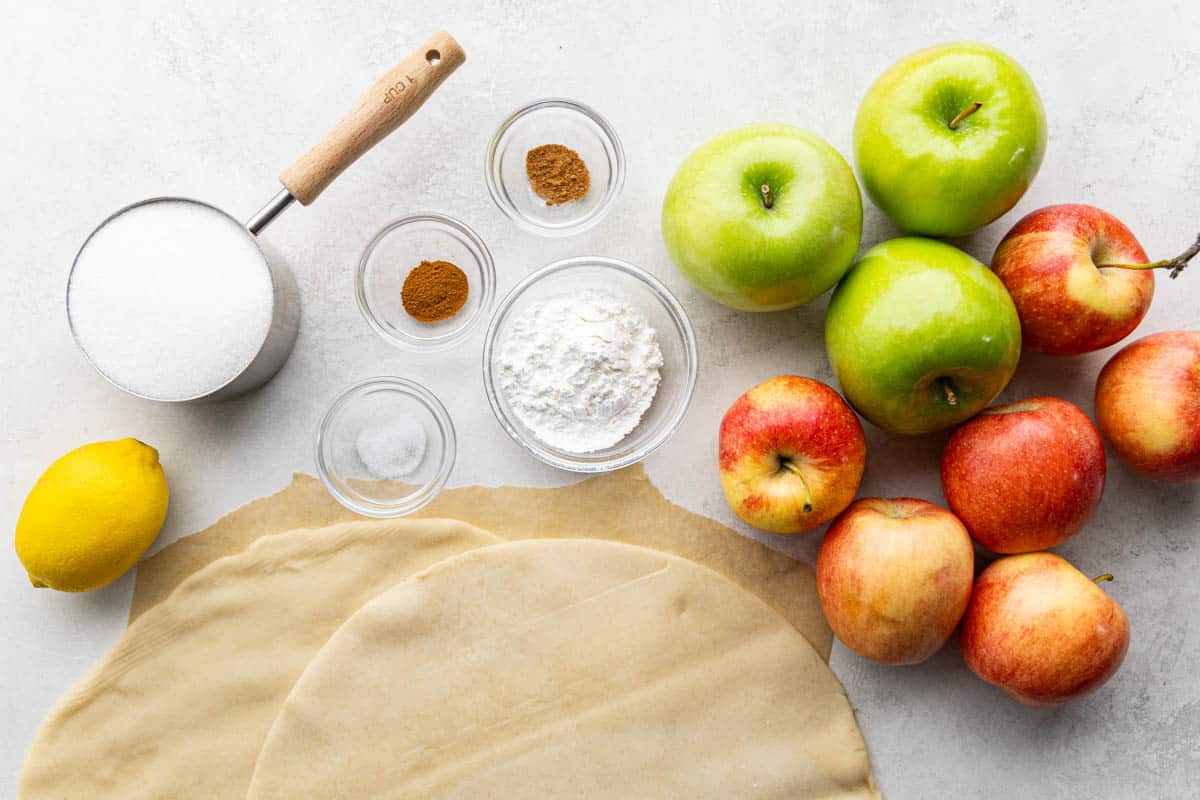
Which apples are best in an apple pie?
Here’s a closer look at some top choices for pie-making:
- Granny Smith: A classic choice for apple pie, Granny Smith apples are beloved for their tartness and firm texture. They hold up exceptionally well under heat, ensuring your pie has a nice texture with a bit of bite.
- Honeycrisp: These apples offer a perfect balance of sweet and tart flavors, along with a crisp texture. Honeycrisp apples can make your pie filling exceptionally juicy and flavorful, adding a natural sweetness that might reduce the need for added sugar.
- Golden Delicious: If you prefer a sweeter pie, Golden Delicious apples are a great choice. They have a mild, sweet flavor and a tender texture that breaks down slightly when baked, creating a smooth filling.
- Braeburn: Braeburn apples have a combination of sweet and tart flavors, with a firm flesh that holds up well in the oven. They’re excellent for adding depth of flavor to your pie.
- Jonagold: A cross between Jonathan and Golden Delicious apples, Jonagolds strike a nice balance between tartness and sweetness. They’re juicy and hold their shape well, making them a great option for pie fillings.
Mixing Apple Varieties
For a pie that’s rich in flavor and has a complex texture, consider using a mix of apple types. Combining tart and sweet apples can give your pie a more interesting profile, with different levels of sweetness and acidity. A mix can also create a more visually appealing filling, with varying textures from different apple varieties melting together.
Caramel Apple Pie Variation
Absolutely! Incorporating a drizzle of salted caramel into your apple pie adds a wonderful richness and a hint of saltiness that complements the sweetness of the apples. You can mix about 1/4 cup caramel with the apple filling before baking for a deep caramel flavor throughout, or drizzle 1/4 to 1/2 cup of it over the finished pie for a gooey topping.
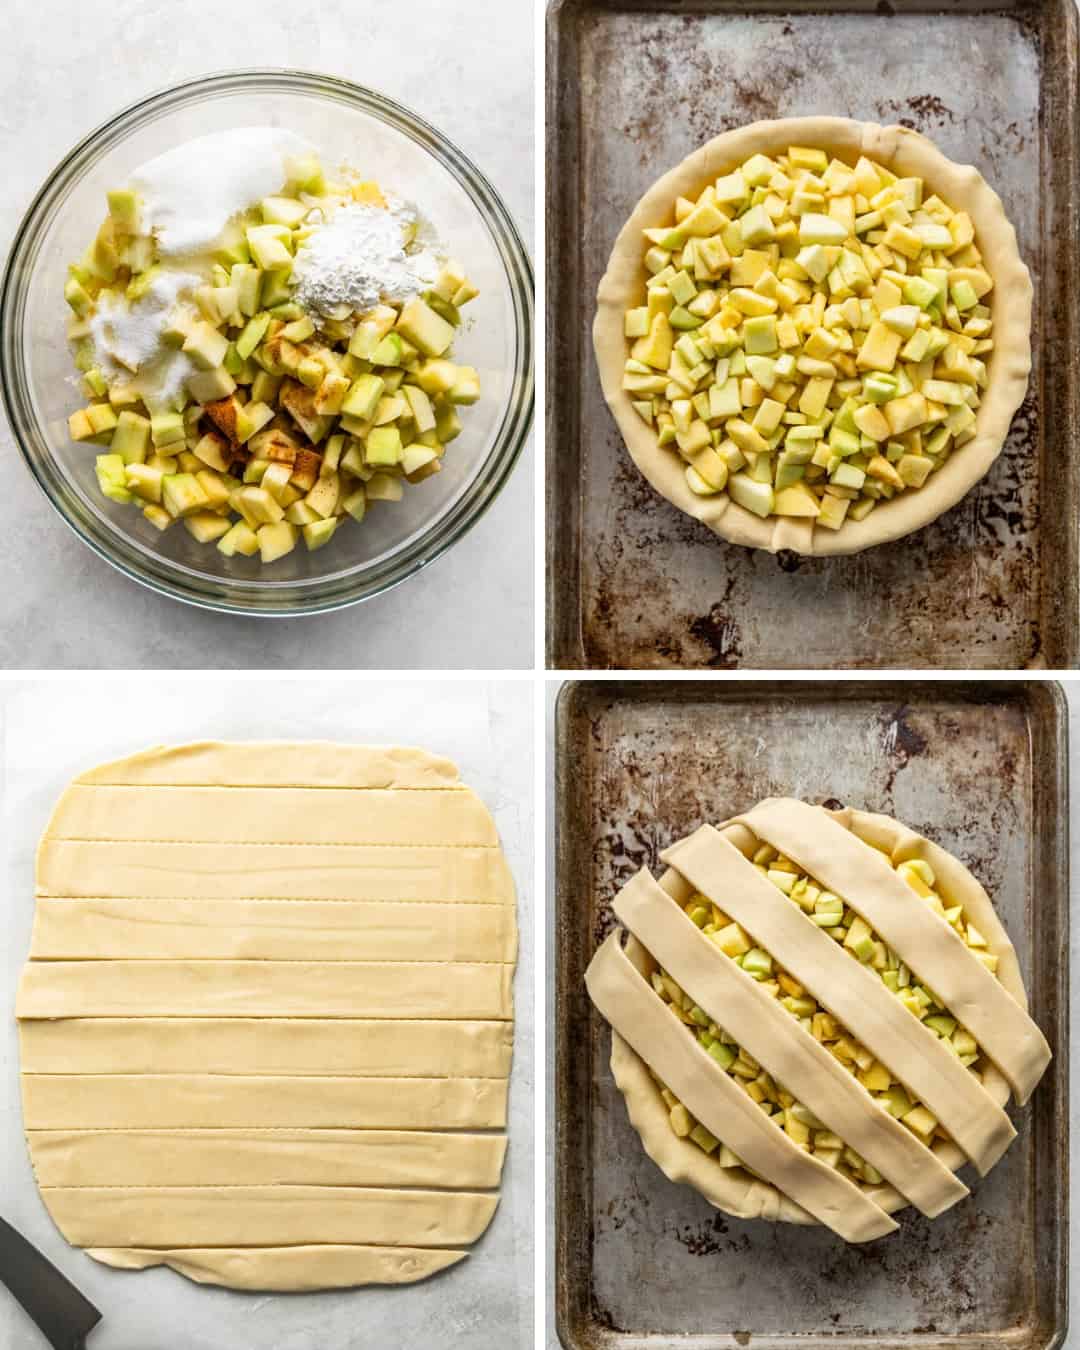
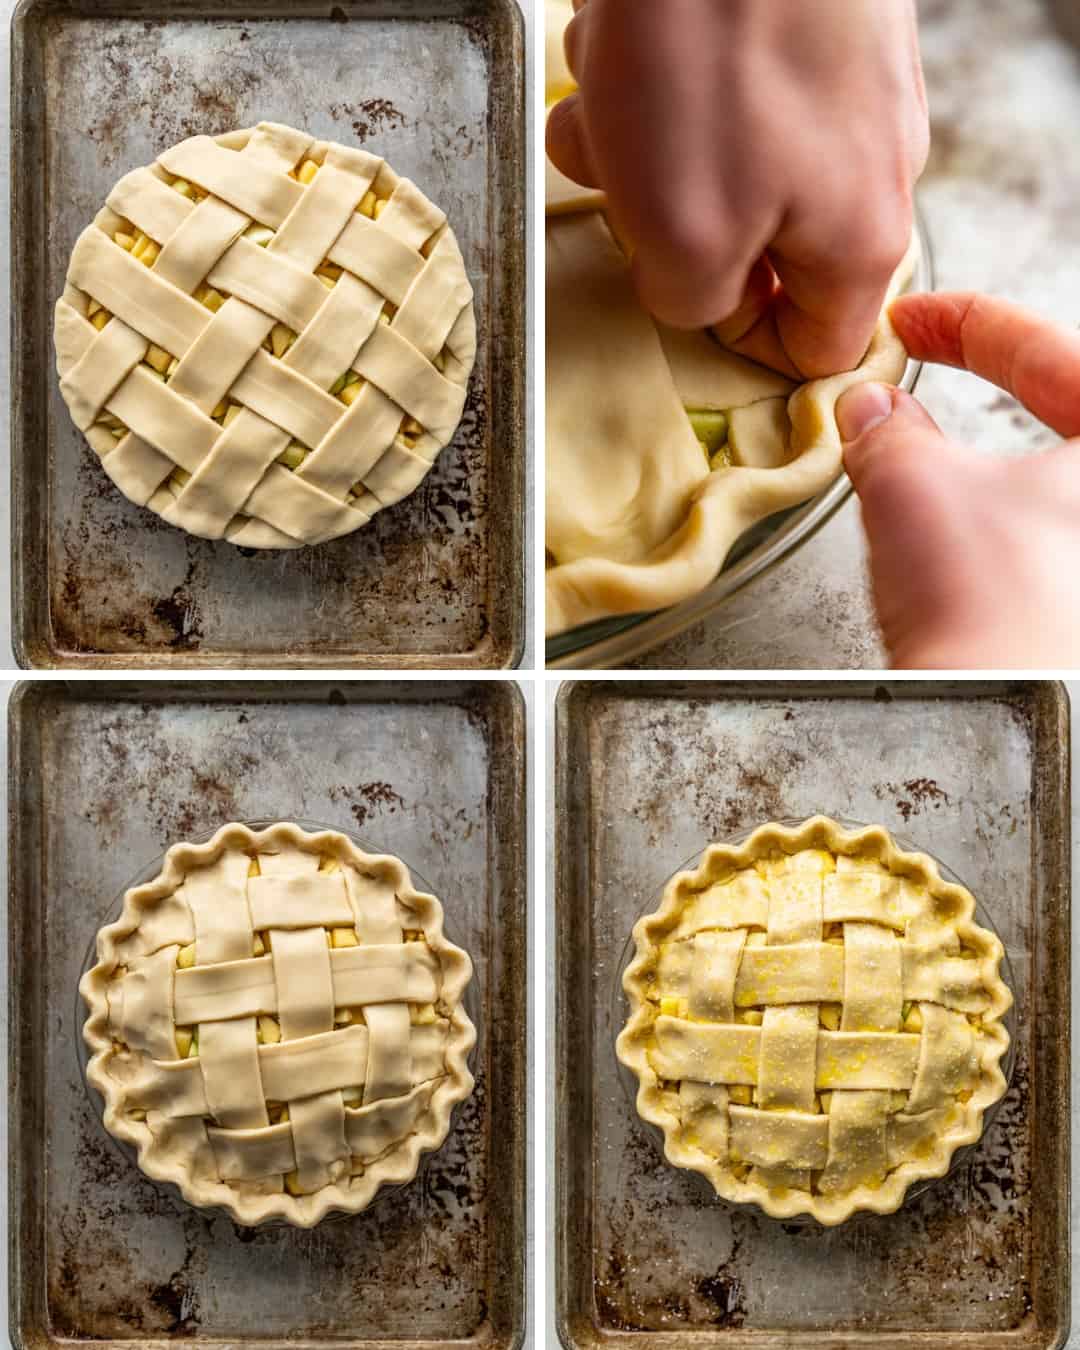
Lattice vs. Non-Lattice Top
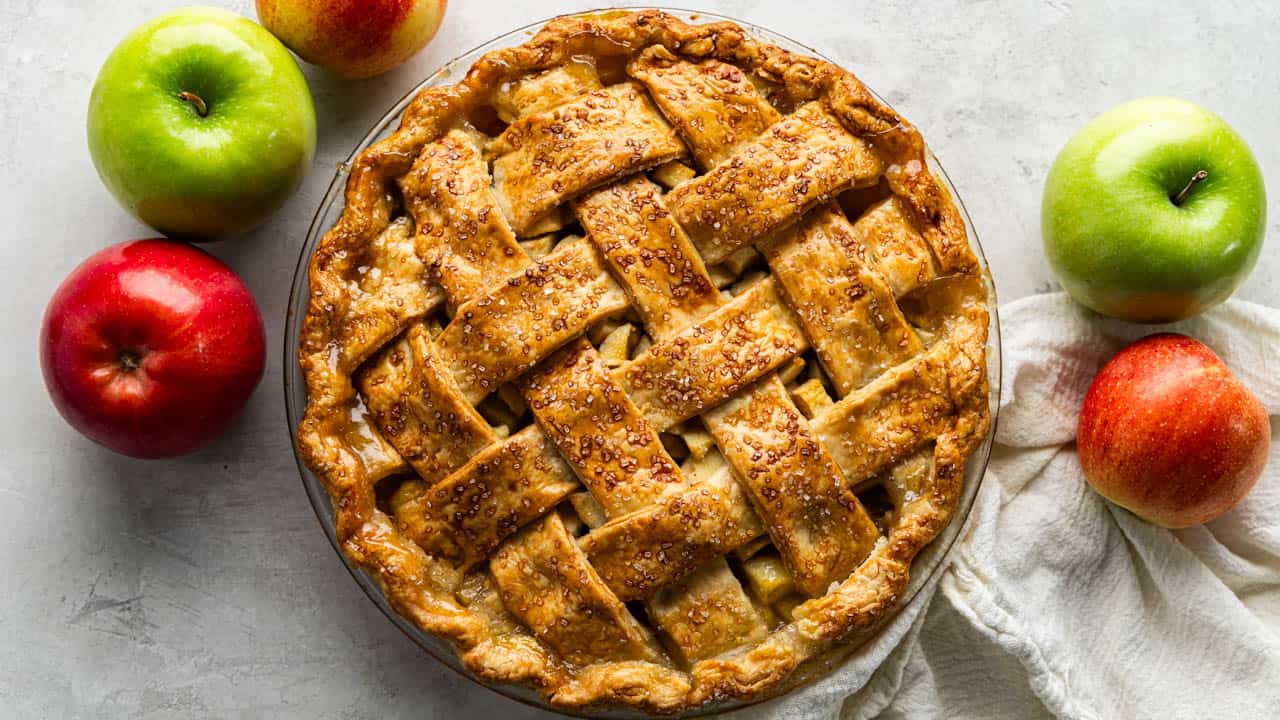
- Lattice Top: Involves weaving strips of dough, allowing steam to escape and creating a visually appealing pattern. Perfect for those who enjoy a little baking challenge and a beautiful presentation.
- Non-Lattice Top: A solid piece of dough covers the pie, requiring venting via small slits to release steam. This method is simpler and quicker, ideal for a straightforward, rustic look.
Venting is essential for non-lattice tops to prevent steam buildup. A few decorative slits or a pie vent can enhance your pie’s appearance while ensuring the filling cooks evenly.
Homemade vs. Store-Bought Crusts
A Homemade Crust offers control over flavor and texture, but store-bought crusts are a great option if you need to save time. If purchasing store-bought, our friends over at Simply Recipes have an amazing taste-tested review of the most common store-bought pie crust brands.
Troubleshooting
- Crust Browning Too Quickly: If you notice the edges of your pie crust browning too fast while it’s still baking, immediately cover the edges with strips of aluminum foil or use a pie crust shield. This can prevent further browning while allowing the rest of the pie to bake properly.
- Filling Overflowing: Place a baking sheet or aluminum foil under the pie to catch drips and avoid a messy oven.

Tips From Chef Cayt
- Freshness Matters: Regardless of the variety, choose apples that are fresh and in season for the best flavor.
- Taste Test: If possible, taste the apples before using them in your pie. This can help you adjust the amount of sugar according to the apples’ natural flavors and sweetness.
Storage & Reheating Instructions
- Store leftovers, covered, in the refrigerator for up to 5 days. Leftovers can be eaten cold, or reheated in the microwave in 30-second increments.
- To freeze, cool completely. Wrap each individual slice tightly with plastic wrap. For added protection against freezer burn, use aluminum foil to wrap slices with a second layer. Freeze for up to 3 months.
- To thaw, transfer to the refrigerator and allow to thaw overnight, at least 12 hours. A slow thawing process helps maintain the pie’s texture.
- Reheat in the microwave in 30-second increments.
My 6yr old great niece asked me last night if I could help her make an apple pie from scratch. Then today your recipe pops up. So I guess we’re making apple pie this weekend.
How do I store Apple pie so the crust stays fresh and crispy- when I store pie in refrigerator the crust usually get soft and no longer flaky and crisp
I store it in Tupperware pie container
To keep your apple pie crust flaky and crisp, the key is to avoid trapping excess moisture when storing it. Here’s how to do it:
Let the pie cool completely before storing — this prevents steam from softening the crust. Once cooled, store the pie at room temperature, uncovered or very loosely covered with foil, for up to 2 days. If you need to store it longer, cover it lightly and place it in the fridge for up to 4 days, but know the crust may soften a bit.
For best results when serving later, reheat slices in the oven or toaster oven at 350°F for about 10 minutes to bring back that crisp texture. Avoid the microwave — it makes the crust soggy.
Wonderful apple pie recipe Rachael. I bought one of your cookbooks and I am in love with your recipes. Thank you.
I’m so excited to make your apple pie. It’s been a long time since I’ve made one. Apple pie always has been my favorite pie. I’m glad you suggested different types of apples. That’s going to be fun.
Thanking you for sharing. BT
Perfect,,,, yummy as I can see
Thank you for your beautiful delicious apple pie recipe. You are a amazing chef and a beautiful soul. God bless you always. 🙏 ❤️