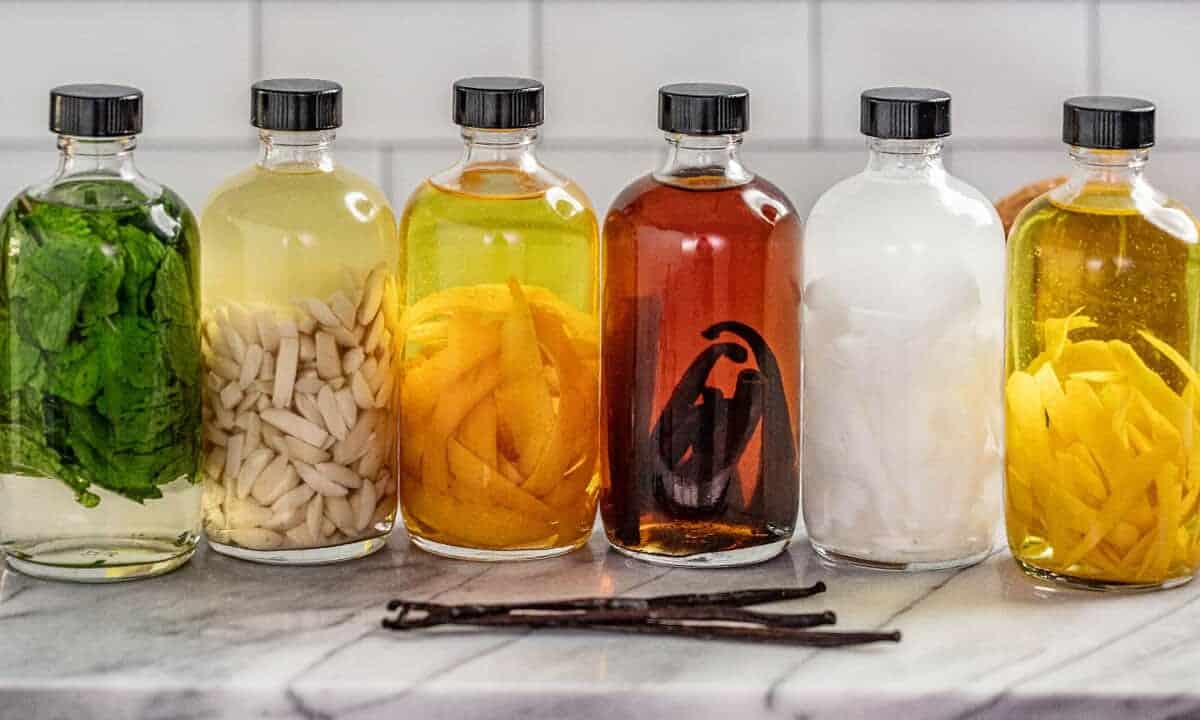
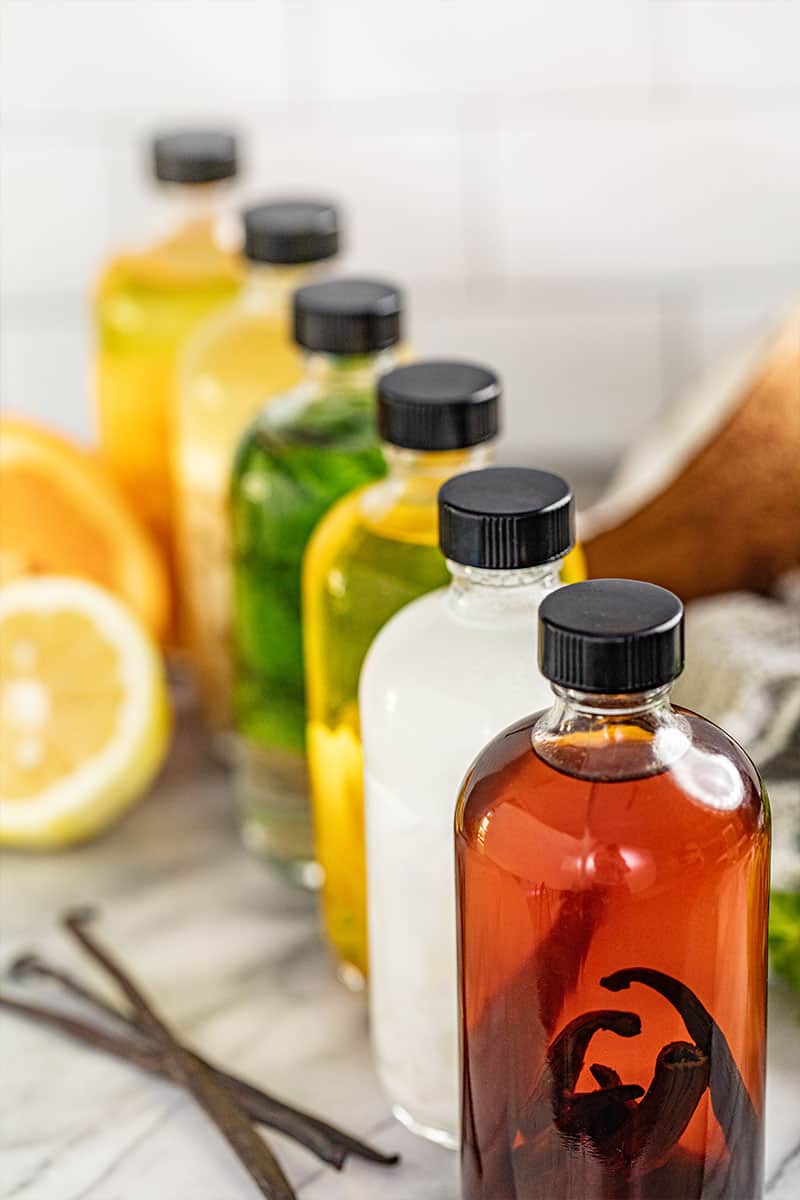
Pure, homemade extracts are easy to make and are one of the easiest ways to level up your cooking and baking. These simple instructions can be used to make any extract flavor using quality ingredients—no fillers, imitation flavors, or corn syrup! Whether you’re making vanilla, citrus, or even something unique like banana or caramel extract, this guide will walk you through everything you need to know to make them the right way.
Jump To
Why Our Recipe
- Accurate ratios! We’re using the right ratios and methods to make sure your extracts are actually flavorful, not just boozy.
- Everything you need to know. From the best ingredients to storage tips, we’ve got you covered so your extracts turn out amazing every time.
- More than just vanilla. We’re breaking down how to make all kinds of extracts, including citrus, cinnamon, and even fun flavors like banana and caramel!

Have you ever wondered how extracts are made? Have you ever wondered why they are so expensive? It is probably because not that many people know how easy they are to make. We’ve always got various bottles of homemade in the kitchen because they’re just plain better. We’re covering all the details to set you up for success.
Most Important Ingredient: Alcohol
Alcohol is required to make a true extract. Don’t worry, it’s completely safe for use, even for kids, just like you see on the store shelves.
The type of alcohol you use makes a huge difference in the final flavor of your extracts. You’ll want something with at least 35% alcohol (70 proof) to properly extract and preserve the flavors. Different extracts work best with different alcohols.
- Vodka (Neutral & Versatile) – The most common choice because it doesn’t add any extra flavor, letting the ingredient shine. Best for vanilla, citrus, cinnamon, and fruit extracts.
- Bourbon (Warm & Sweet) – A great alternative for vanilla extract. It adds depth making it a popular choice for baking extracts.
- Rum (Rich & Caramel-Like) – Works well for vanilla, cinnamon, and tropical fruit extracts like coconut or banana. Dark rum gives a deeper, molasses-like flavor.
- Everclear (High-Proof & Potent) – Best for mint and delicate herbs because it extracts flavor quickly and prevents that “grassy” taste. Can be diluted with water before use.
What About Other Alcohols?
You might see recipes calling for brandy, whiskey, or other liquors, which you can totally use. Keep in mind that these add their own flavor to the final extract. If you want a clean, traditional extract, stick to vodka or a neutral grain alcohol.
What About Non-Alcoholic Extracts?
If you’re avoiding alcohol, you can substitute food-grade glycerin for a glycerite-style extract. However, these don’t extract flavors as effectively and tend to be much weaker than alcohol-based extracts.
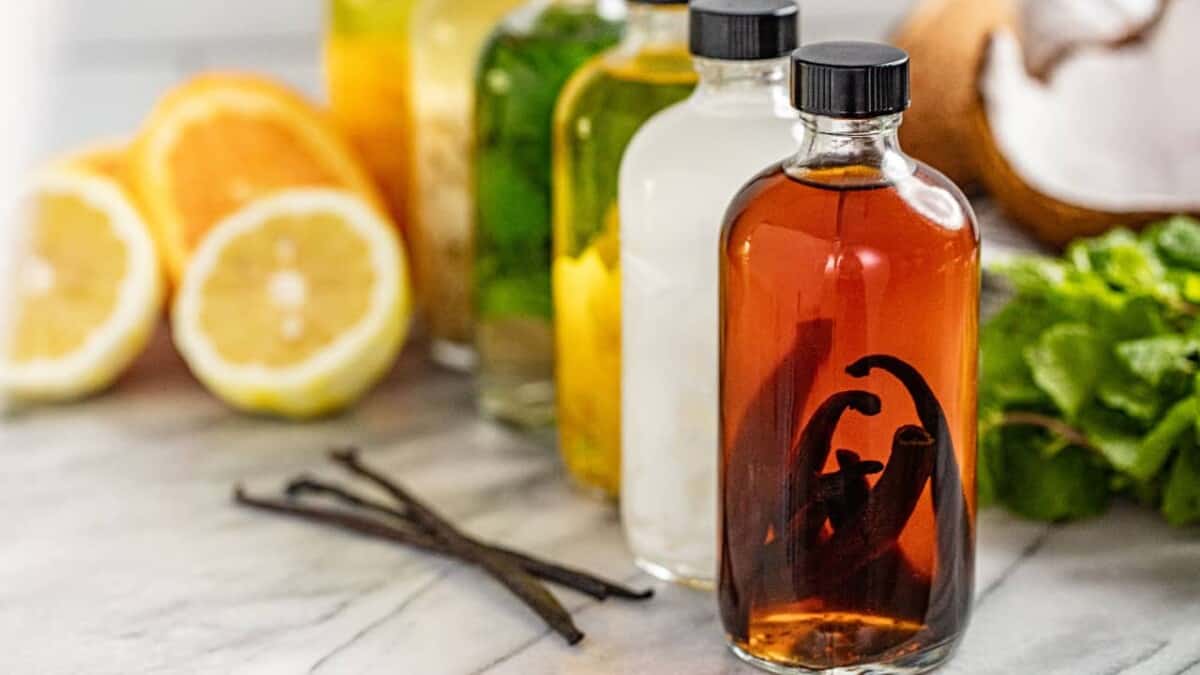
All About Vanilla Beans
Not all vanilla beans are created equal! If you want real vanilla extract that actually tastes like vanilla (and not just alcohol), you need to use the right type and amount of beans.
Grade A vs. Grade B Vanilla Beans
- Grade A (“Gourmet”) – These are plump, moist, and full of vanilla caviar (the tiny specks inside the pod). Best for cooking but not ideal for extracts because they contain too much moisture.
- Grade B (“Extract Grade”) – These are drier and slightly wrinkled but have a more concentrated flavor, making them the best choice for extracts.
The Correct Vanilla Bean Ratio
The scientifically correct ratio is: 1 oz of vanilla beans per 8 oz of alcohol
That usually means 8 to 10 beans per 8 oz of alcohol, depending on their size and moisture content.
Where to Buy Quality Vanilla Beans
Look for Madagascar, Tahitian, or Mexican vanilla beans from a trusted source. Reputable sources will clearly label the bean’s origin and grade, ensuring you get fresh, high-quality beans with the right moisture content for extracts.
Online specialty retailers that focus on vanilla beans, such as Beanilla or Vanilla Bean Kings, tend to offer better quality and fresher stock than grocery stores. Always check reviews and avoid the cheapest options, as low prices often mean lower-quality, dried-out beans.
How Long Should Vanilla Extract Steep?
While 6 weeks is enough to begin infusing, the extract at that stage will still have a strong alcohol taste and a weak vanilla flavor, but can still be used. A full 12 months allows the alcohol to break down the vanilla beans properly, resulting in a much richer, more balanced extract. Many homemade extract makers prefer to wait 12-18 months for the best flavor.
Pro Tip: Shake the bottle every few weeks to help the extraction process.
Other Flavors of Extracts
Almond Extract (Not Actually Almonds!)
Traditional almond extract is made from bitter almonds, apricot kernels, or peach pits because they contain benzaldehyde, the compound responsible for almond flavor. Regular sweet almonds do not contain enough of this compound to produce a strong almond extract.
You can still use regular almonds, Just keep in mind that the flavor will be much milder and more subtle than traditional almond extract. Toasting the almonds beforehand can help, but it still won’t be as intense as the real thing.
Ratio: Use 1/2 cup (65g) of bitter almonds, apricot kernels, or peach pits per 8 oz (1 cup) of vodka.
Alcohol Choice: Vodka (80 proof / 40% alcohol) is best for a neutral flavor, but rum can be used for a slightly sweeter extract.
Ideal Steeping Time: 3 to 4 months, shaking the jar once per week.
Straining: Strain out the solids using cheesecloth or a fine-mesh sieve.
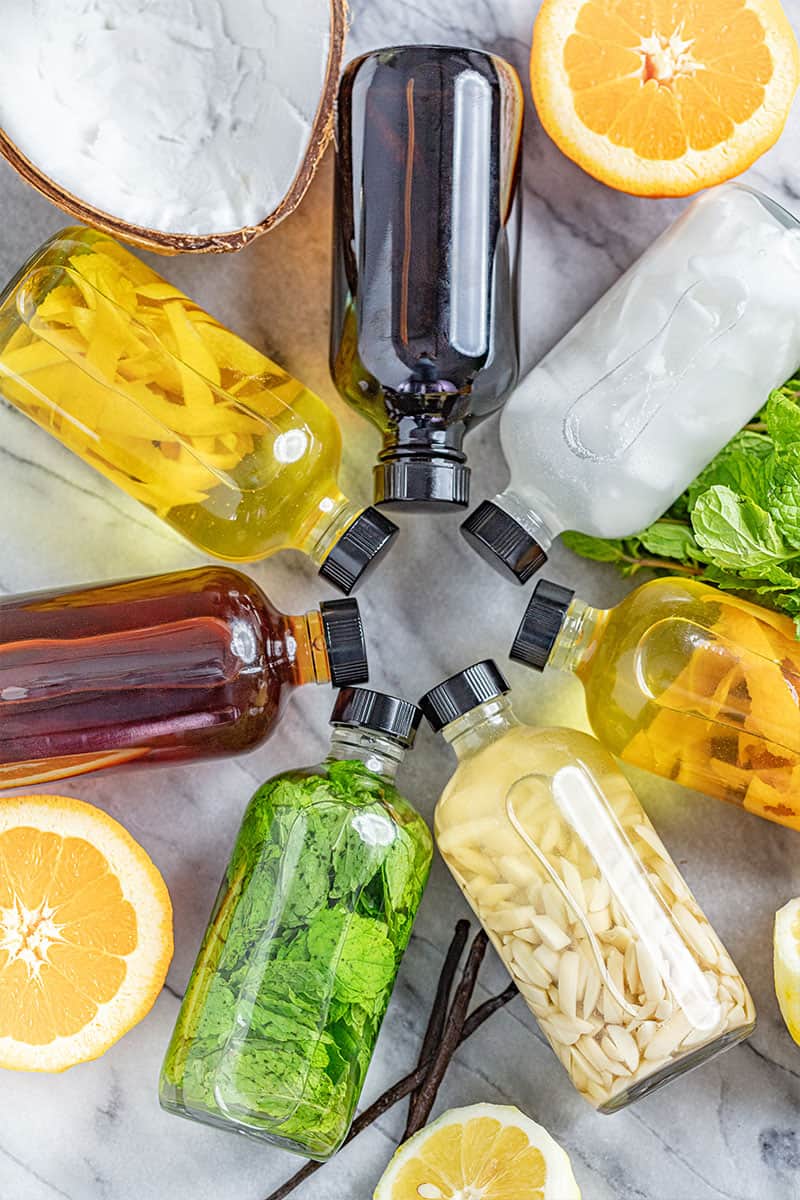
Citrus Extracts (Lemon, Orange, Lime, Grapefruit)
Citrus extracts are made from the zest, not the juice. Use only the outer zest and avoid the white pith, which can be bitter. Organic citrus is best to avoid wax and pesticides.
Ratio: Use 1/2 cup (loosely packed) of citrus zest per 8 oz (1 cup) of alcohol. This equals about 6 lemons, 4 large oranges, 6 limes, or 2 large grapefruits.
Alcohol Choice: Vodka (80 proof) for a neutral extract or light rum for a richer depth of flavor.
Ideal Steeping Time: 6 to 8 weeks, shaking the jar once per week.
Straining: Remove zest and strain through a fine-mesh sieve or coffee filter.
Mint Extract
Fresh mint can be used to make extract, but it requires careful handling to prevent bitterness. Over time, fresh mint leaves can turn brown and develop off flavors if left too long in alcohol. If using fresh mint, it’s best to steep for a short period and remove the leaves once the flavor is extracted. Dried mint, on the other hand, creates a more stable extract with a longer shelf life.
Ratio: Fresh mint requires 1 cup (loosely packed, 25g) of fresh mint leaves per 8 oz (1 cup) of alcohol. Dried mint requires 1/2 cup (12g) per 8 oz (1 cup) of alcohol.
Alcohol Choice: Everclear (120-151 proof / 60-75% alcohol) extracts mint’s oils more efficiently than vodka. However, vodka can still be used for a milder extract.
Ideal Steeping Time: Fresh mint should steep for 1 to 2 hours, then be removed to prevent bitterness. If using dried mint, steep for 6 to 8 weeks, shaking once per week.
Straining: Strain immediately after steeping using cheesecloth or a coffee filter.
Cinnamon Extract
Whole cinnamon sticks work best, as ground cinnamon won’t dissolve properly in alcohol. Mexican (Ceylon) cinnamon is naturally sweeter and smoother than cassia cinnamon.
Ratio: Use 3 to 4 cinnamon sticks (about 15g) per 8 oz (1 cup) of alcohol.
Alcohol Choice: Vodka (80 proof) is best, but dark rum can add depth and natural sweetness.
Ideal Steeping Time: 6 to 8 weeks, shaking once per week.
Straining: Remove cinnamon sticks and strain through a fine-mesh sieve or coffee filter.
Fruit Extracts (Peach, Strawberry, Banana, Pomegranate, etc.)
True extracts rely on essential oils, which most fresh fruits lack. Instead of a pure extract, this method produces a fruit-infused alcohol, which can add natural fruit flavor but will not be as concentrated as commercial extracts that you’ll find at the grocery store and should not be used as a replacement for them in recipes.
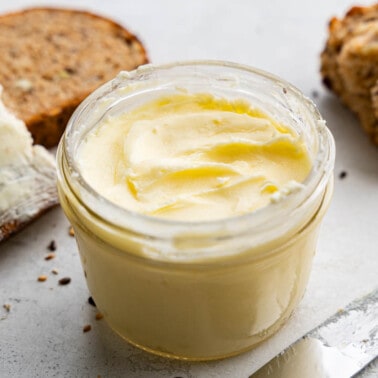
Butter Extract
A homemade butter extract made with clarified butter and alcohol will have a mild, natural butter flavor but will never be as strong as a commercial extract you’d find on the store shelf to use in baking and should not be used as a replacement for them in recipes. Because butter is mostly fat, it doesn’t extract into alcohol the same way vanilla beans or citrus zest do.
How to Tell When an Extract is Ready
The best way to determine if an extract is done is by smell, color, and taste. The alcohol should no longer have a harsh bite, and the extract should smell strongly of the main ingredient. The longer an extract steeps, the more concentrated and well-rounded the flavor will become.
If an extract is still weak after the recommended steeping time, let it steep longer and shake the jar occasionally to encourage extraction. Some ingredients take more time to fully develop, and a little patience goes a long way!
Reusing Ingredients
Some ingredients can be reused for a second batch, but not all ingredients will maintain enough potency to be effective. There are two main rules of thumb to guide you:
1) Ingredients that release their oils slowly (like vanilla beans, whole cinnamon sticks, and whole cloves) can sometimes be reused once, but the second batch will be much milder.
2) Ingredients that give up their flavor quickly (like citrus peels, fresh herbs, or soft fruits) should not be reused.
To Strain or Not to Strain
Some ingredients should be removed once the flavor has been fully extracted to prevent bitterness, off-flavors, or spoilage. Use these two rules of thumb to determine whether to strain or leave ingredients in:
1) Ingredients that continue to develop flavor over time (like vanilla beans, whole cinnamon sticks, cloves, and nutmeg) can sometimes be left in, but their flavor will intensify the longer they steep. If the extract becomes too strong, remove them.
2) Ingredients that lose their potency or can cause spoilage (like citrus peels, fresh herbs, and fruit) should always be strained out after the recommended steeping time. Leaving them in too long can lead to bitterness or breakdown, which may introduce excess moisture and shorten shelf life.
If an extract seems too weak after straining, fresh ingredients can always be added and steeped longer to enhance the flavor without having to start over.
Storage Containers
When choosing a bottle, look for one with a tight-fitting lid to prevent evaporation. Avoid containers with plastic lids, as alcohol can cause some plastics to degrade over time. If reusing bottles from store-bought extracts, sterilize them with hot water and let them dry completely before refilling. You can find extract-size bottles in most cooking stores and online.
Amber or Cobalt Glass Bottles – These are the best choice for storing extracts because they block out UV light, which can degrade the flavor over time. They also look great for gifting.
Clear Glass Bottles – Can be used if stored in a dark place, but extracts kept in clear bottles should not be exposed to direct sunlight.
Swing-Top Bottles – These provide a tight, airtight seal and are easy to pour from.
Dropper Bottles – Ideal for small-batch extracts or extracts used in precise amounts, such as almond or mint extract.
Small Mason Jars – Good for steeping extracts, but not ideal for long-term storage unless transferred to a more airtight bottle after straining.
Storage Instructions
Alcohol-based extracts have an indefinite shelf life if stored correctly. The high alcohol content naturally preserves the ingredients, preventing spoilage. However, over time, extracts may slowly lose some potency.
For the best flavor, homemade extracts should be used within 2 to 5 years. To keep them fresh for as long as possible:
If an extract starts to smell off or loses intensity, it may be time to make a fresh batch. For vanilla extract, you can top it off with more alcohol as you use it to help maintain its strength.
Use dark glass bottles (amber or cobalt) to protect the extract from light, which can degrade the flavor over time.
Store in a cool, dark place, like a pantry or cabinet away from direct sunlight and heat.
Keep the bottles tightly sealed to prevent evaporation and contamination.
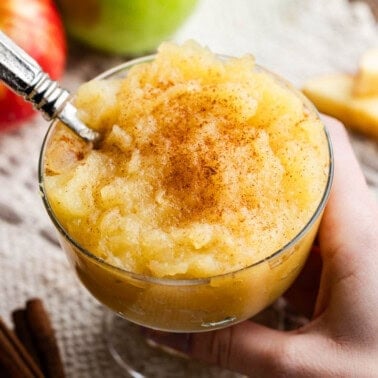
More things you didn’t know you could make at home…
Watch the video below where Rachel will walk you through every step of this recipe. Sometimes it helps to have a visual, and we’ve always got you covered with our cooking show. You can find the complete collection of recipes on YouTube, our Facebook Page, or right here on our website with their corresponding recipes.
Hello! If we can’t use the fruit extracts in recipes where the extracts are called, then what is the point? I am not trying to be negative or anything, but it was one of the reasons I was looking up butter extract and banana extract, because I could not find ONE without natural or artificial flavors. *sad face*
It really just comes down to science. Strawberry extract, banana extract, and butter extract are really difficult to replicate at home. Why? Because they are all water soluble and volatile. They break down quickly in alcohol and lose flavor whereas with other extracts, you get more flavor developing over time. You “can” make those extracts this way, but you’ll end up with something that’s very mildly flavored which isn’t what you are looking for. Commercially made extracts use lab-isolated flavor compounds or distilled strawberry essences in order to achieve that concentrated flavor.
This is the ideal page I was looking for. Been making vanilla extract for a couple years. My mom doesnt like using any other. But here I found some dos and dont’s in making extracts. I screwed up when I shared mine. Now people want me to make there’s way in advance for holidays. So,,,,, I start cranking it out around February. Ready for the Holidays. Thanks for sharing. Now,,, I’m able to make different kinds. Best part is, People buy different items I need. Some buy the Jars, Some buy the vodka or whiskey for payment of a jar or 2 of extract leaving me with more stuff to work with. I buy the vanilla beans.
Matt
I’m wanting to make my own extracts for my farmers market goodies, but I didn’t realize it would take so long for them to steep. Is there a way to shorten the time? When I made oregano oil I had to warm the oil before putting the oregano in it and it maybe took 3 weeks. Could you do something similar for these? Thanks!
Infused oils are very different than extracts. Even at 6 weeks, purists view this it as far too short of a time period and that you need at least 6 months.
Look into sous vide for extracts. I just did some vanilla this way and it speeds it up considerably. I’d imagine it would work for other ingredients as well.
Great gift idea, I usually do something home made, extract& spices this year with maybe baked goods using some of the items plus the recipe.
You have given me a new challenge as well as a money saver! I did not know it was this easy to create what I normally paid thru the nose for by the ounce.