
Whether you’re using a stand mixer, a hand mixer, or just a mason jar, this process not only yields deliciously fresh butter but also dives right into the very basics of cooking and using fresh ingredients. Homemade butter is downright delicious in and of itself and can feel like an extra special treat spread on any homemade bread. Depending on the current price of cream or your dairy sources, it can sometimes even save money over store-bought butter. And one can never underestimate what a fun activity making butter can be for kids of all ages!
Once you make your butter, treat yourself to a slice of heaven with our homemade bread or our famous dinner rolls.
Why Our Recipe
- Instructions for stand mixers, hand mixers, and churning by hand in a mason jar.
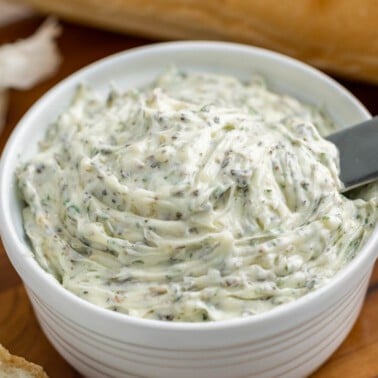
- Spread on your baked goods, use in recipes, or try one of our flavored butters!
- Also makes for a fun old-fashioned activity for kids.

Homemade butter can be made a variety of different ways. A mason jar makes a fun, and accessible activity for people of any age and skill level. All you need is a jar and some heavy cream. For less of an arm workout, you can also use a hand or stand mixer.
Butter Can Only Be Made From Cream
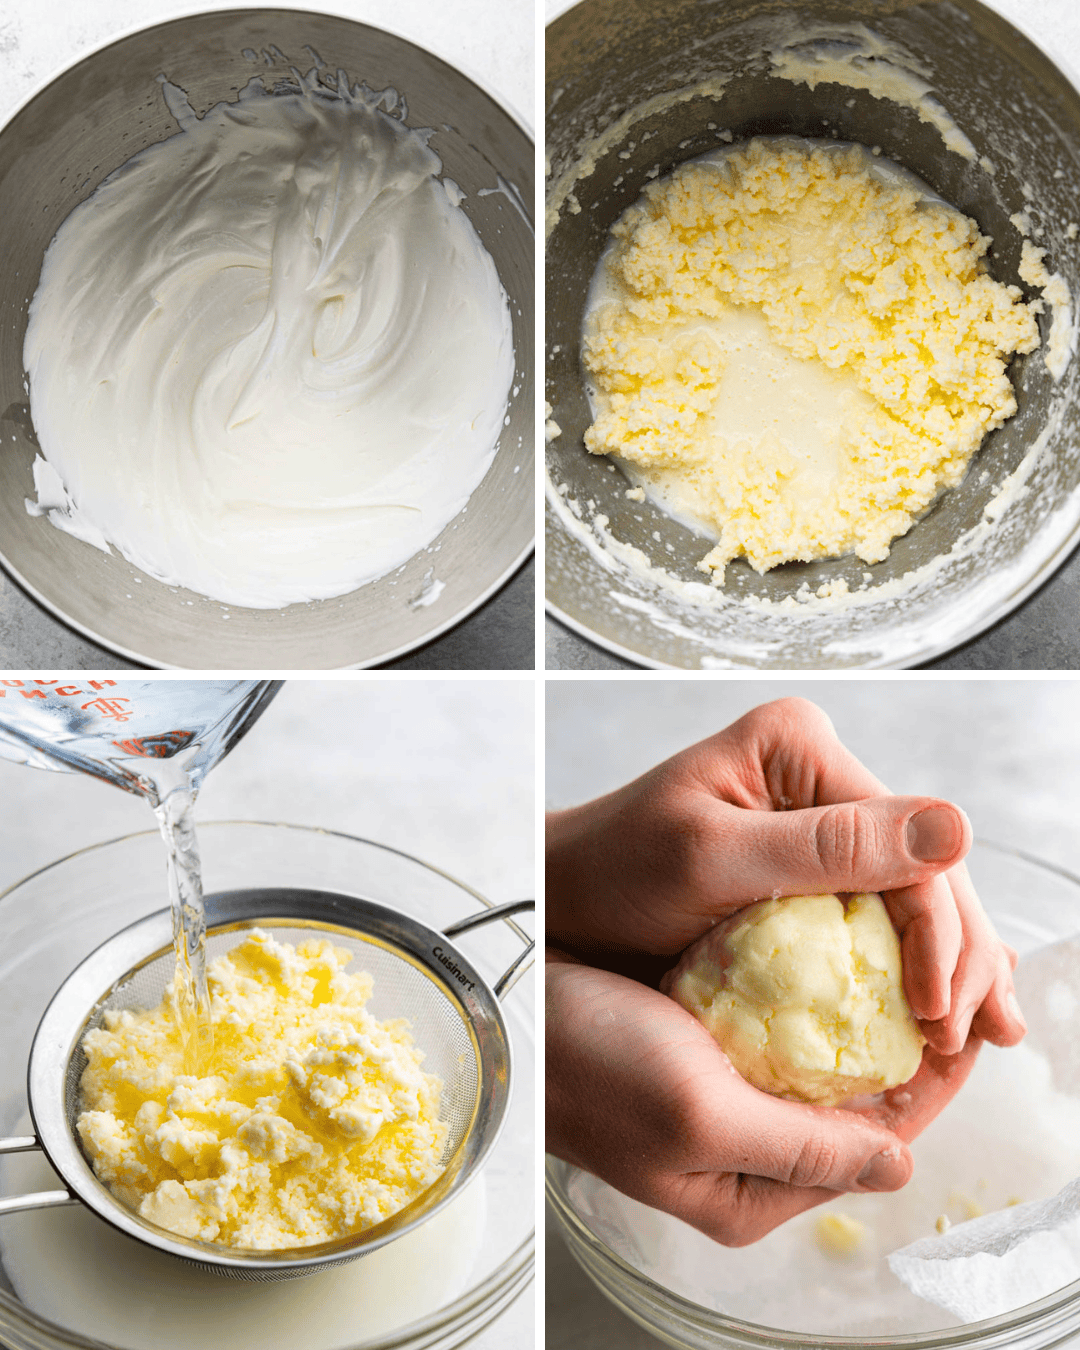
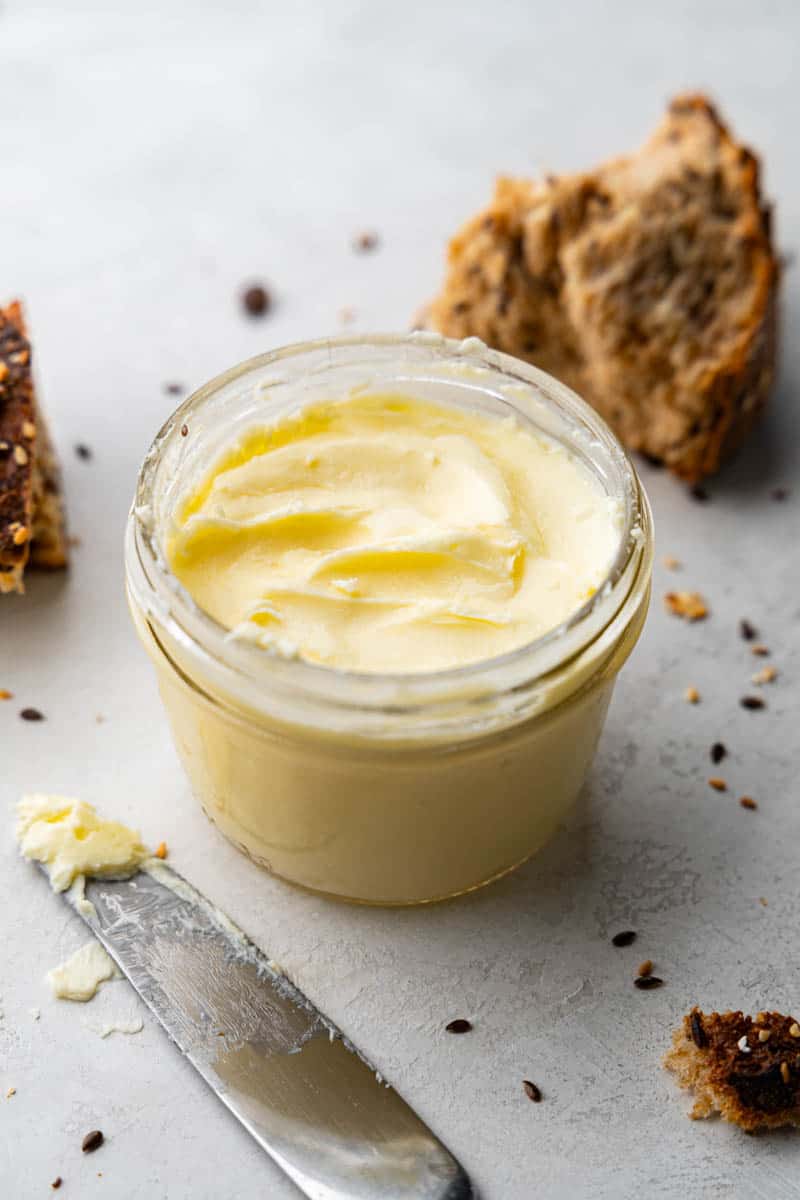
Even if you have your own cow, homemade butter starts with the cream, not the milk itself. After a cow is milked, the cream will naturally separate itself from the milk as it sits. For butter-making, it’s the cream that’s important—the delicious fatty layer that naturally rises to the top. This cream is rich in fat, which is essential for butter as it clumps together when agitated, forming butter and leaving behind buttermilk. So, whether you’re using fresh farm cream or store-bought heavy cream, butter can only be made using high-fat cream.
Heavy Cream or Whipping Cream
For making butter, you want to look for ‘heavy cream’ or ‘heavy whipping cream,’ as these varieties have the highest fat content, typically around 36-38%. This high fat percentage is crucial because it’s the fat that agitates into butter. To ensure successful butter churning, you should use a cream with a minimum of 30% fat content, though ideally, those at 36% or higher are preferred.
Whipping cream, or light whipping cream, contains slightly less fat, usually around 30% to 35%. The lower fat percentage might not yield as much butter, and the churning process could take longer or require more effort to achieve separation of fat from the liquid.
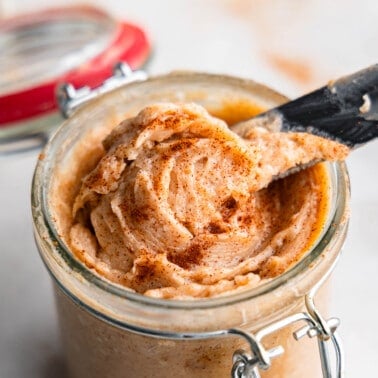
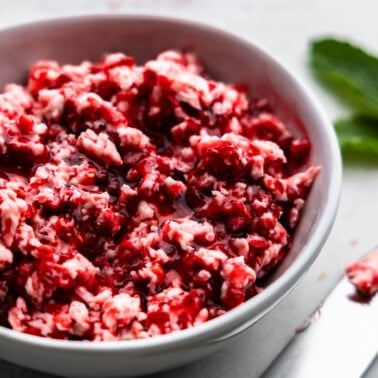
Rinse It Well
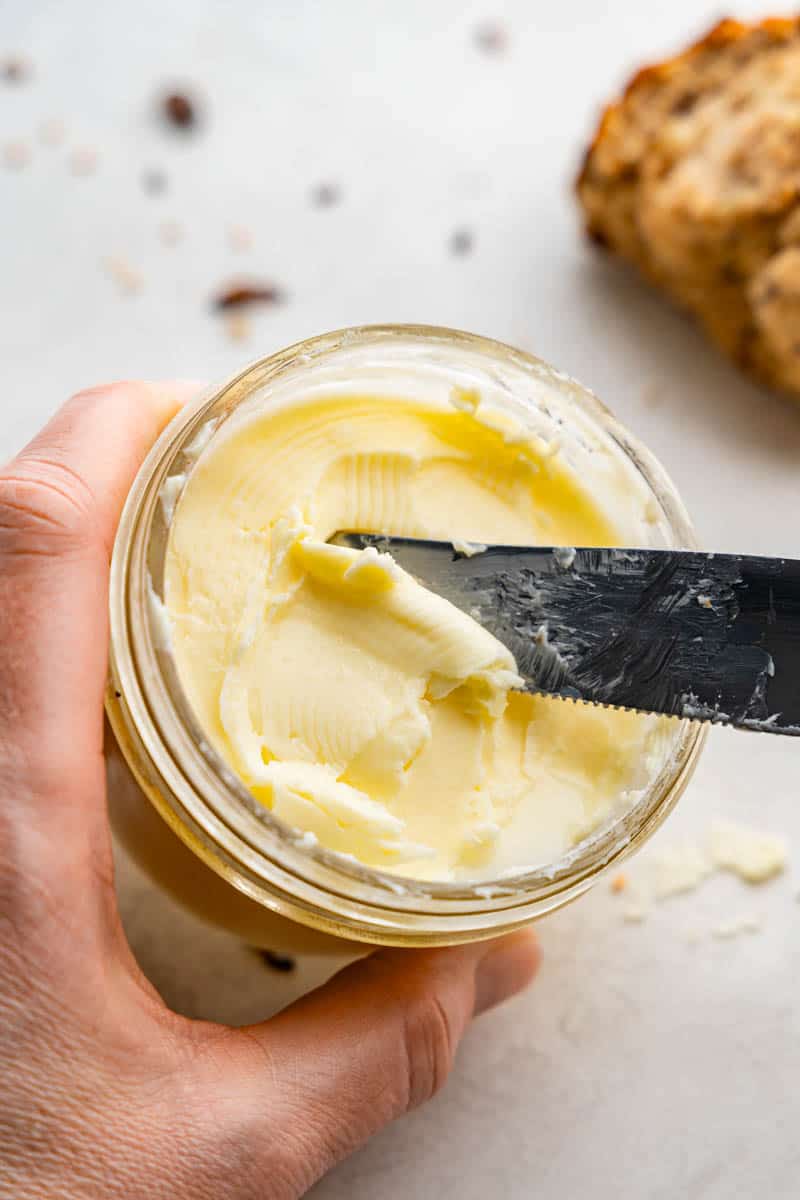
Rinsing freshly churned butter is a crucial step that can’t be overlooked. It removes any remaining buttermilk, which can spoil the butter and give it a sour taste. To rinse effectively, after churning, strain the butter, then wash it under cold water while gently kneading to expel all the buttermilk. Repeat this process 2-3 times until the water runs clear.
Kid’s Activity
Having kids make butter in mason jars is a popular activity to celebrate old-fashioned traditions. We love it because it helps connect kids to cooking and where ingredients come from.
You can use any size of jar you want. Baby food jars are a bit easier for little hands to work with, so consider collecting some of those for reuse if you are doing this activity with smaller children. The recipe is easily adapted to any size of jar. All you have to do is fill the jar halfway with heavy cream and start shaking.
Adding Salt
When to Add Salt: You have two options for adding salt to your homemade butter. You can mix in the salt after the butter has been churned and rinsed, or you can add it directly to the cream before you start churning. The only issue to consider is that adding the salt before churning will also salt the buttermilk so it depends on what you want to use the buttermilk for.
How Much Salt to Add: A general guideline is to use about 1/4 teaspoon of salt for every 1 cup of cream.
Mixing in the Salt: If you choose to add salt after churning, make sure your butter is at a manageable consistency—neither too hard nor too soft. Sprinkle the salt over the butter and use a spatula or your hands to knead it gently into the butter. This ensures that the salt is evenly distributed throughout.
Yield
A good rule of thumb for homemade butter making is that you’ll typically yield about half the amount of butter as the cream used. For example, using 1 cup of cream will generally produce about 1/2 cup of butter.
Storage Instructions
Store butter in an airtight container. How long it stays fresh will depend on how well you rinsed your butter and at what temperature your butter is stored at. Discard butter that smells rancid as that indicates milk proteins have fermented.
At room temperature, your butter will stay fresh for 3 to 5 days.
When refrigerated, your butter will stay fresh for 7 to 10 days.
Butter can be frozen for up to 6 months. Wrap tightly in plastic wrap with an additional layer of aluminum foil to prevent freezer burn. Thaw in the refrigerator or at room temperature. Once thawed, your butter will need to be eaten within 3 to 5 days at room temperature, or within 7 to 10 days refrigerated.
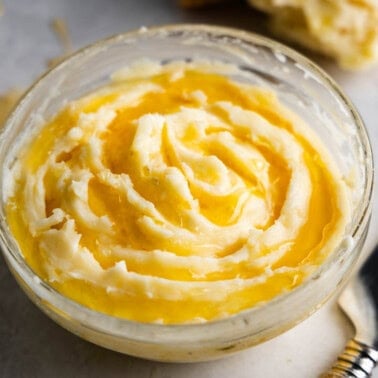
Turn your homemade butter into…
Watch the video below where Rachel will walk you through every step of this recipe. Sometimes it helps to have a visual, and we’ve always got you covered with our cooking show.
I put the finished butter into a bowl of ice water before I mold it. I then take the ball and put it into a French butter keeper that I leave out on the counter. It keeps for at least a week or longer.