
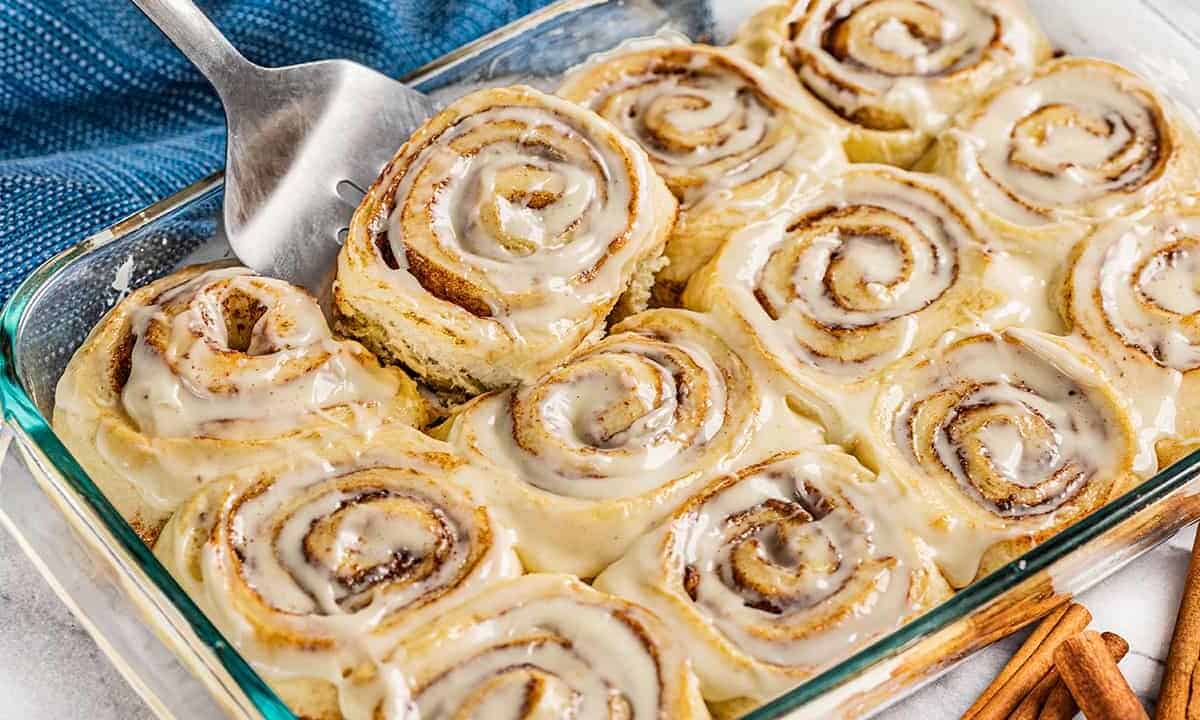
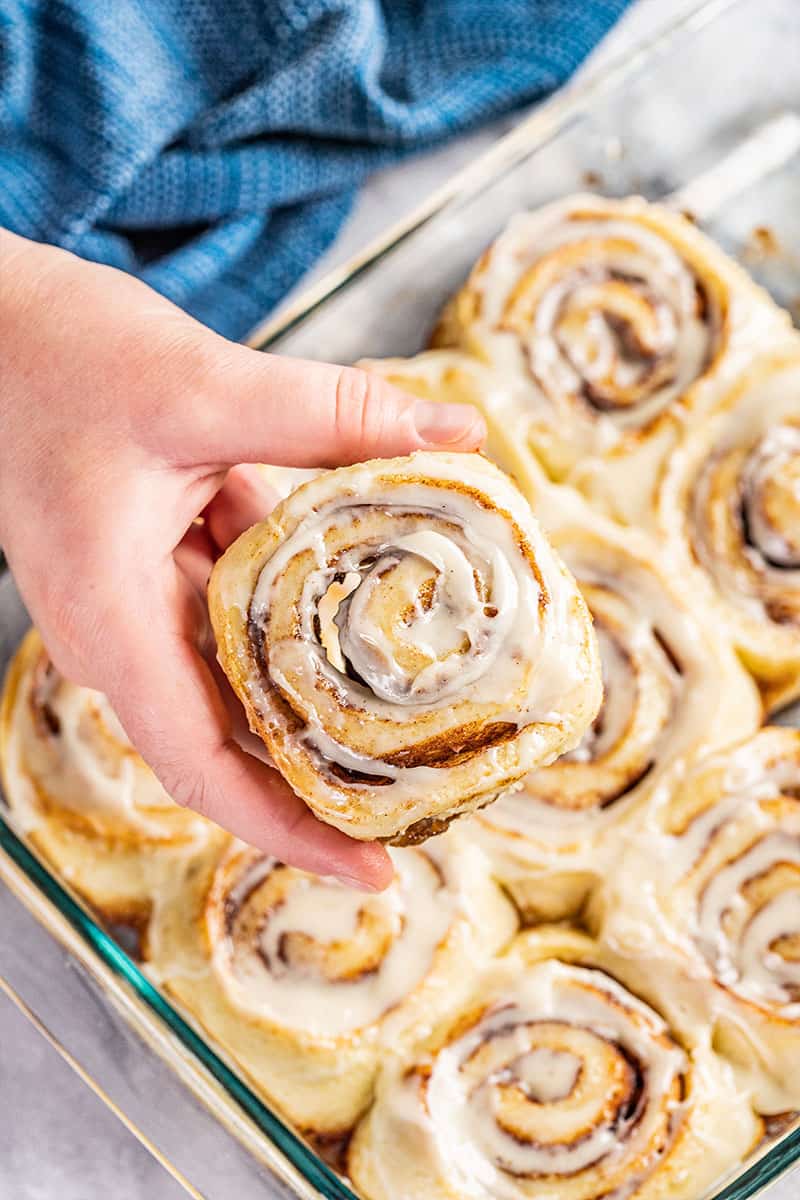
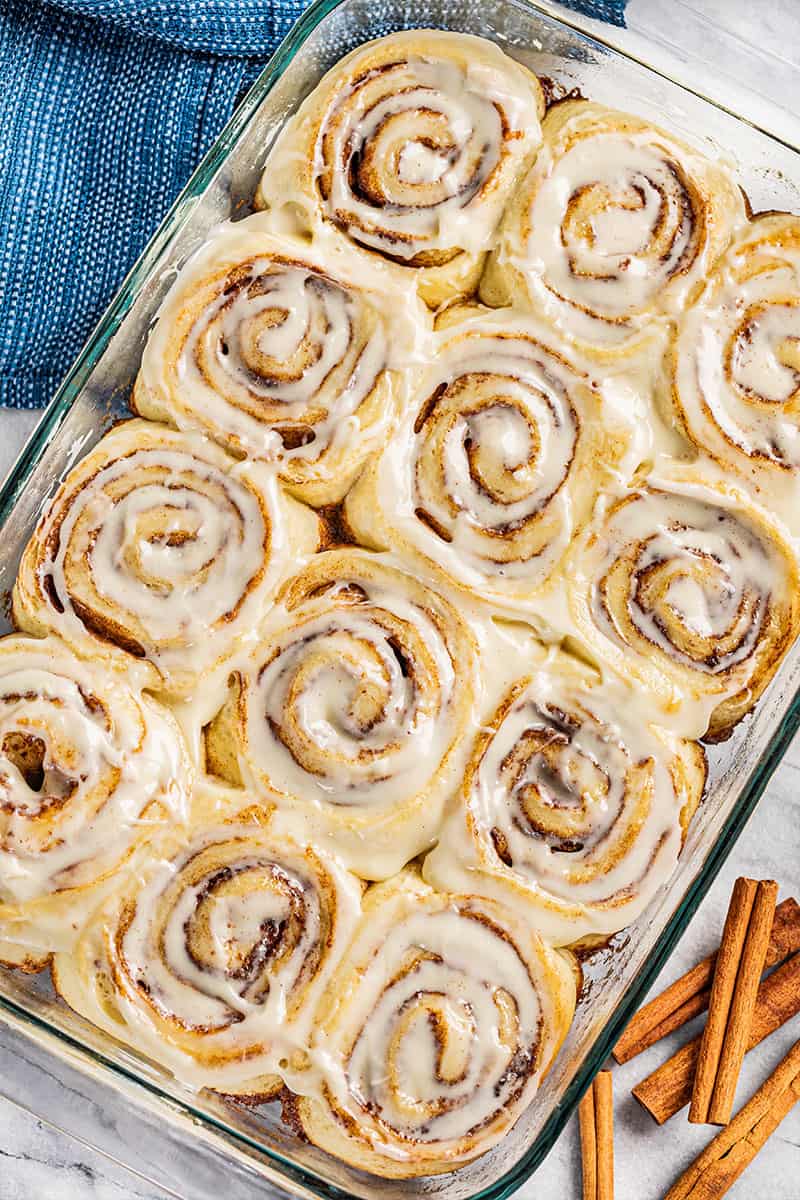
The art of baking homemade cinnamon rolls is both an enjoyable experience and a way to create lasting memories with your family. These rolls, characterized by their soft, fluffy texture and rich, sweet filling, are more than just a treat; they’re a celebration of home baking at its finest. The aroma of cinnamon and sugar filling your home is a delightful precursor to the joy these rolls bring. This guide is here to help you navigate through the process, offering valuable insights and expert tips to ensure success, whether you’re a first-time baker or a seasoned pro. From ingredient selection to serving suggestions, we cover it all, ensuring your cinnamon rolls are delicious every single time.
Ingredient Breakdown & Substitutions
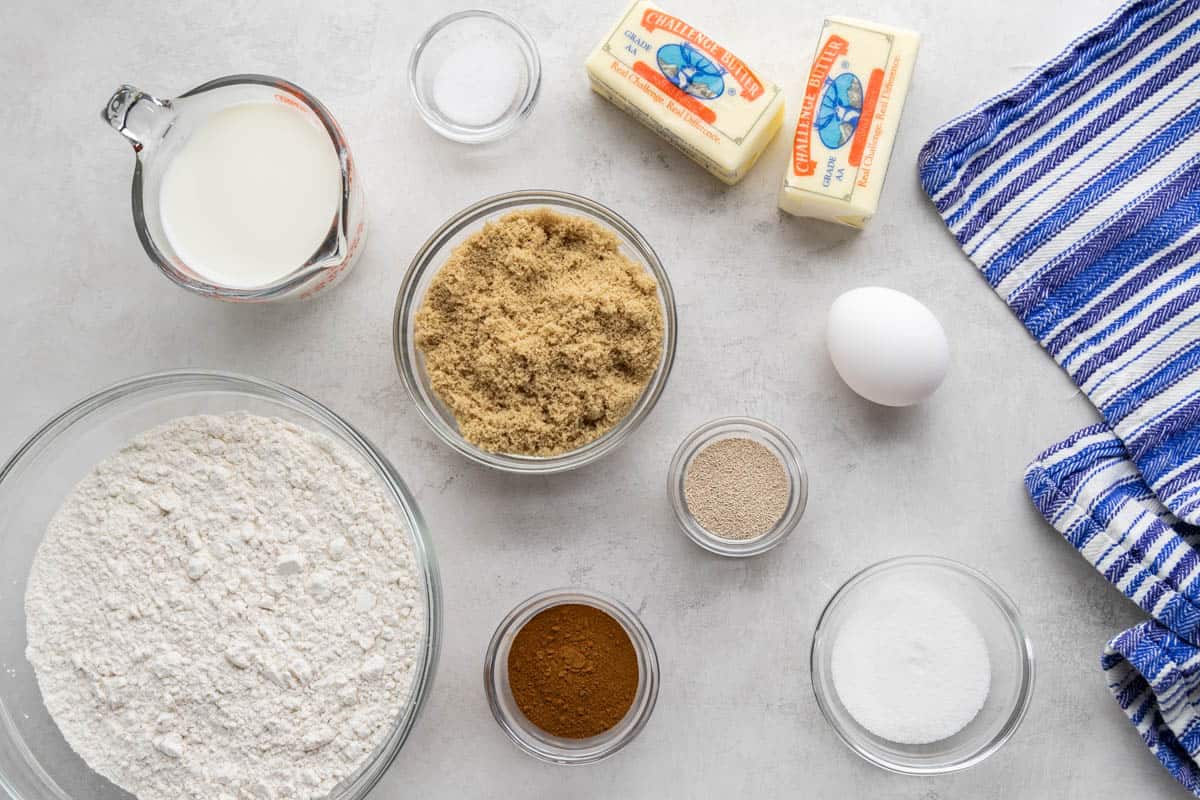
Warm Milk: Milk adds richness and flavor to the dough. It also activates the yeast. For a dairy-free alternative, a plant-based milk substitute can be used. These substitutes still provide the necessary liquid and richness but without the dairy content.
Instant Dry Yeast: Yeast is the leavening agent that helps the dough rise, creating a light, fluffy texture. Active dry yeast can be used as a substitute; just ensure it’s dissolved in warm milk before adding to the other ingredients.
White Granulated Sugar: Sugar feeds the yeast, aiding in fermentation and rise. It also adds sweetness to the dough. For a less sweet dough, you can reduce the sugar by a few tablespoons. Honey or maple syrup can be alternatives, but they might slightly alter the flavor profile.
Salt: Salt enhances flavor and controls yeast fermentation, ensuring the dough doesn’t rise too quickly. If using unsalted butter, increase the salt by a pinch to maintain the flavor balance.
Salted Butter: Butter adds richness, moisture, and flavor to the dough and filling. Unsalted butter can be used in its place; just add an extra pinch of salt to the recipe. For a dairy-free version, use a plant-based butter substitute.
Eggs: Eggs enrich the dough, adding flavor, color, and structure. They also contribute to the dough’s rise and texture. If you need an egg-free version, consider using a flax egg (1 tablespoon ground flaxseed mixed with 3 tablespoons water).
All-Purpose Flour: Flour provides structure to the cinnamon rolls. It forms the backbone of the dough. Bread flour or a mix of all-purpose and whole wheat flour can be used, though this may slightly change the texture.
Brown Sugar (Filling): Brown sugar adds sweetness and moisture to the filling, giving it a rich, caramel-like flavor. You can adjust the amount based on your preference for sweetness.
Ground Cinnamon (Filling): Cinnamon is key for the signature flavor of the rolls. It pairs beautifully with brown sugar to create a warm, spiced filling.
Frequently Asked Questions
You can knead it by hand! Start out by stirring with a spoon until you can’t do it anymore, and then knead it by hand. Just keep on kneading until all the flour is incorporated and/or the dough is soft to the touch and only slightly sticky. It’s a bit of a workout, but it’s worth it!
The flour you buy at the store these days is generally pre-sifted. There is no need to sift your flour. We prefer the scoop and sweep method as it is ultra-convenient. Simply use your measuring cup to scoop out the flour and level off the top. Weighing your flour using a kitchen scale is the only way to ensure complete accuracy. Even then, bread making is both fickle and forgiving, and the actual amount of flour you add can change just due to the humidity in the air. When making this roll recipe, it is best to go by the touch and feel of the dough. 1 cup of flour is approximately 125 grams.
The butter should be at room temperature and smoosh easily to the touch. If you soften the butter in a microwave, be sure to work in small time increments so you don’t get any melted pools of butter.
This recipe has been tested with both salted and unsalted butter without a huge or notable difference. Either will work.
The dough should be slightly sticky, but still very soft and pliable. It should just barely not be sticking to the bowl. If you add too much flour and the dough stiffens, your rolls will also get a little stiff. You can definitely feel a soft roll just by touching the dough.
We have used both all-purpose flour and bread flour without a huge or notable difference. We do not have a preference, so just use whichever is convenient.
We have not personally tested any variations of gluten free flours. It has been reported in comments that the gluten-free flour mix, Cup for Cup, works in this recipe; we cannot personally vouch for it.
If you need to reduce sodium for dietary reasons, don’t fret. Reducing salt will not affect the rising. The only thing it will impact is flavor.
The milk should be warm to the touch, between 100 and 110 degrees. You can use 1% up to whole milk. We never recommend using skim milk for anything.
These cinnamon rolls can easily be made ahead. For best results, choose one of the following two methods:
Overnight Make-Ahead Instructions:
After you’ve rolled and cut your cinnamon rolls and placed them into your lightly greased baking pan, cover with plastic wrap and place in your refrigerator. The next day, remove them from the fridge and allow them to come to room temperature (about 45 minutes to an hour depending on the temperature of your house) before baking.
Freezer Make-Ahead Instructions:
Roll and cut your cinnamon rolls and place several inches apart on a baking sheet to freeze rolls individually. Once frozen, transfer to a resealable plastic freezer bag. When ready to bake, place in a lightly greased baking dish and allow to come to room temperature before baking.
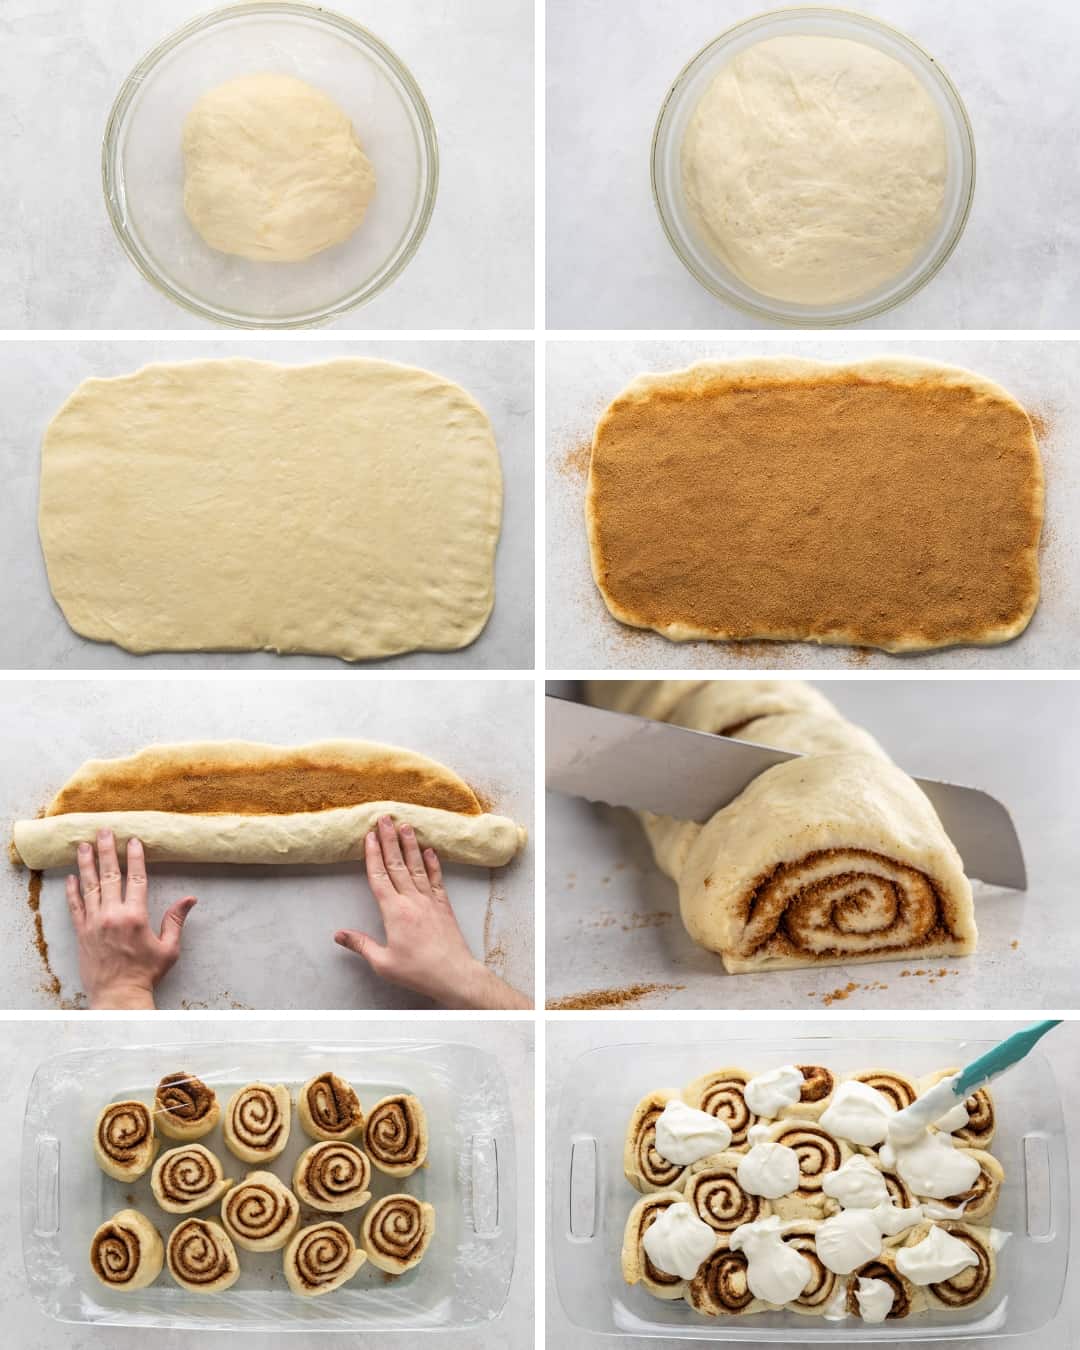
Step-By-Step Visual Guide to Cinnamon Rolls
Troubleshooting
- Dough Not Rising: Ensure your milk is warm but not hot; extreme temperatures can kill the yeast.
- Tough Rolls: Avoid over-kneading the dough, and make sure it’s not too dry.
- Undercooked Rolls: Remember, cooking time depends on roll size. Ensure a light brown color on top for doneness.
Tips From the Chef
- For consistent baking, roll the dough to an even thickness.
- Don’t overfill, too much filling can cause the rolls to unravel or become soggy.
- Give the dough ample time to rise to ensure the fluffiest rolls.

Storage Instructions
- Room Temperature Storage: Keep in an airtight container for up to 2 days.
- Refrigeration: Store in the fridge for up to 5 days.
- Freezing: Wrap individual rolls in plastic wrap and freeze. Thaw and reheat in the oven or microwave.
More Sweet Roll Recipes
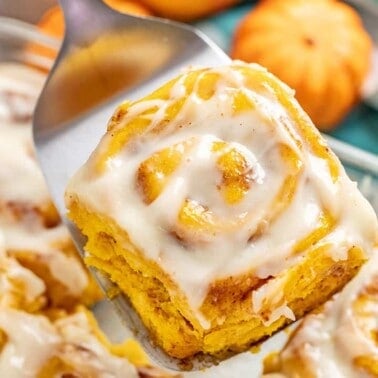
Pumpkin Cinnamon Rolls
1 hr 18 mins

Best Homemade Orange Rolls
2 hrs 20 mins
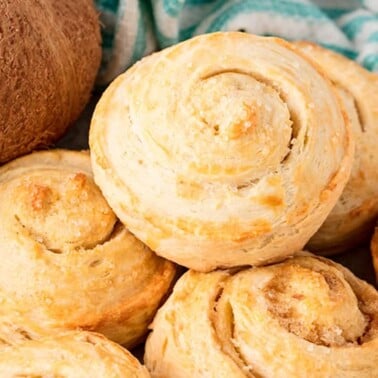
Coconut Rolls
2 hrs 55 mins
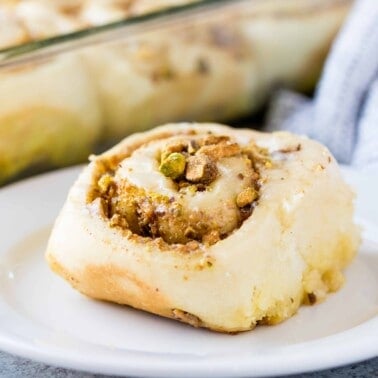
Baklava Cinnamon Rolls
2 hrs 5 mins
Watch the video below where Rachel will walk you through every step of this recipe. Sometimes it helps to have a visual, and we’ve always got you covered with our cooking show. You can find the complete collection of recipes on YouTube, Facebook Watch, or our Facebook Page, or right here on our website with their corresponding recipes.

Non-butter version I was out of butter after making the dough! So I substituted margarine in the filling due to high water content I cooked the filling first (to get the water out) and added 3 tbs of cornstarch- chilled the concoction while the dough was rising shockingly it worked! None of my filling leaked out! For the icing I used coconut oil instead of butter. Note to self BUY more butter!!! I posted this jic a non-dairy person needed tips!
Hi!
I’ve made this about 6 or 7 times. The past three or four times they have deflated. What am I doing wrong?
Thanks
Hi Anna! While not the author, I am a pastry chef- usually if a baked good deflates, it’s overproofed. Try less time on the second rise.
Don’t go by the stated time on the rise’s go by the look of the dough! Look up how to test your dough for readiness (finger poke) I bake ALOT of bread and my rise times are always shorter than stated! Keep practicing
I have made these over and over again. Good recipe, the cinnamon rolls always turn out yummy.
This was my first time making cinnamon rolls and they did not disappoint!! They were delicious!! Thank you for sharing!
My mom used to roll out her dough, put lots of butter and cinnamon and sugars and walnuts and roll it but instead of slicing it into rolls, she formed it into a ring.
She would make a slice with a knife for a couple inches apart for venting. Then when it was done, she would let it cool for 45 minutes to an hour and them make a buttercream frosting. You can get a lot more goodness inside and what bubbles out of thse slits is the the most buttery cinnamony candy. You can snatch it before it hardens in the pan or you could line yur pan with parhment so you gould get it off as a hard candy more easily. You cut the ring in wedges to serve it.
This cinnamon roll recipe is so awesome! No left overs at all😔
Followed the recipe exactly and so very happy with the results. Definitely a keeper and do over!!
These are delicious! I omit the cream cheese and use a simple glaze. I will make these cinnamon rolls again…and again…and again!!
I have made these for years using this recipe and I do love the ratio of dough to filling to frosting. Thank you so much to the creators for posting this, I have recommended it to others who also found success. However, here is what I’ve learned from trial and error:
1) If your rolls are undercooked or taking forever in the oven, they did not rise properly to room temp before you baked them. When I make this, I make the rolls the night before, place them in the greased glass 13×9 baking dish covered with plastic wrap, and put them in the fridge. Then, I get up **4 hours** before I want to bake them, put them on the counter to rise, then go back to sleep. Once I’m up in the morning, they are fluffy in the pan, completely room temp, and bake in the time the recipe says. If you touch the inner rolls in the pan and they’re cold, just know you’re going to have an uneven bake because the outside rolls will bake while the inside rolls will waste heat catching up to room temp.
2) Do not use a stand mixer. If your dough is the right consistency, you’ll likely break or hurt the motor on your Kitchen aid. Just use your hands and accept that you’ll probably use closer to 4 cups of flour to get that tacky texture. Start mixing with a spoon then transition to hand kneading
3) When you’re first making the dough, make sure your milk isn’t more than 110-120 degrees Fahrenheit. You will kill your yeast and you will be sad. Check online, it says that the optimal temp to activate instant dry yeast is 110-120 degrees F. I use a meat thermometer to check this
4) When rolling and cutting the dough, I usually roll it so it is 18 inches instead of 12in. I did it on accident but now I prefer it because I get 12-14 rolls all about 1.5 inches tall or so, and I find it much more satisfying and evenly baked (i.e., soft outsides and insides, instead of crunchy outsides goopy insides). Note that I still only put 12 rolls in a pan, so I just get a baby pan for the extra rolls
5) Use a knife to cut it. Don’t do dental floss. It seems cool, but resist the temptation.
6) Icing should be slightly less than drizzle consistency. Keep in mind it will hit the hot rolls and melt, so if it is already drizzle you’re going to have cinnamon roll soup in your pan
7) If your rolls are coming unrolled pre-bake, I suggest placing them in your pan touching so they push against neighboring rolls to stay coiled. This will not affect rising or baking potential. Further, when you’re spreading the butter/brownsugar/cinnamon mixture, leave a 1cm lip untouched so the dough can stick to dough when you roll it
Your kitchen aide must need servicing. I use mine all the time for rolls and breads and it is not a drain on the motor. She demonstrated in the video so obviously it is not. For people who like to feel the dough in your hands by all means use them but people please know you can once again trust Rachel. You don’t give a reason why we should resist dental floss but if it’s safe in my mouth it must be ok cutting rolls. Unless it’s flavored of course. It saves my pastry mat from knife marks and makes a much neater cut. I agree putting the icing on the top too hot can be messy and not very pretty. I like to hold a little back in a baggie. I clip a corner and swirl it on top before serving so some stands out and the rest is melted in. The best of both worlds.
Very good! We did bake a little longer.. highly suggest these!
Great recipe made tonight and they are delicious