
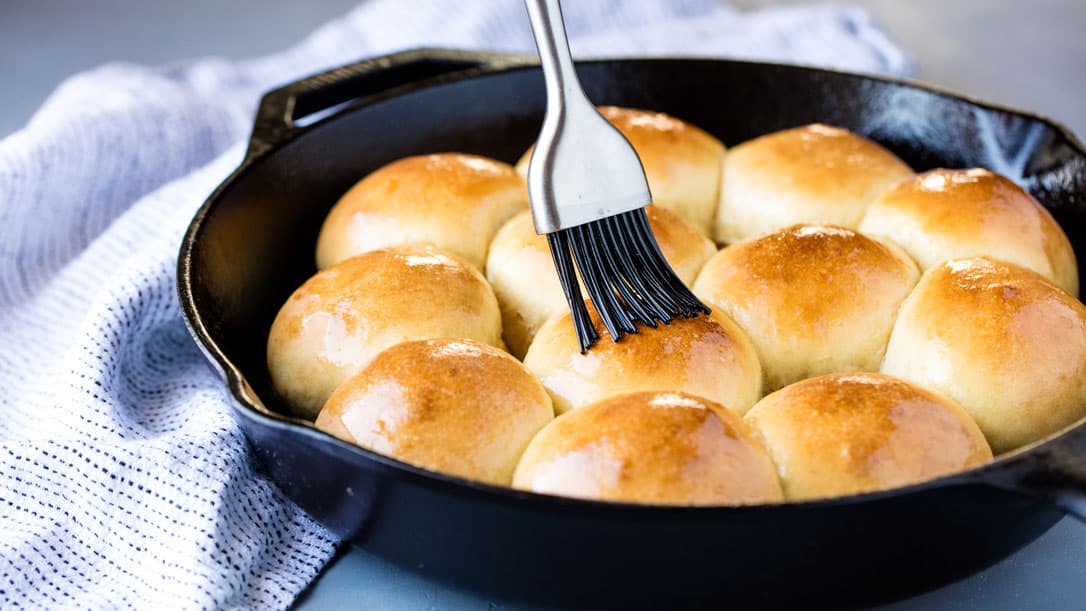
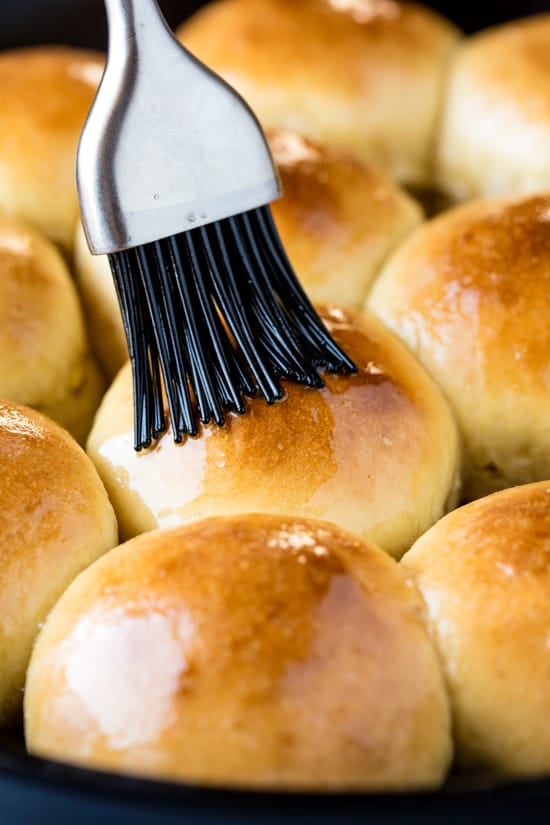
Rapid Rise Skillet Yeast Rolls will have homemade dinner rolls on your table in under 1 hour with absolutely not stand mixer required!
The Best Homemade Dinner Rolls Ever has been made in millions of homes across the globe. They take three hours to make from start to finish and they are absolutely heavenly! But we understand that sometimes you need rolls FAST. So now we’re giving you a quick yeast roll that is heavenly in its own right and a perfect recipe to keep your sleeve for those nights when you want to serve up hot, homemade rolls quickly.
Yeast Options for Rapid Rise Skillet Rolls:
The best yeast to use for roll making is Instant Dry Yeast. This can also be labeled as rapid rise yeast, quick yeast, or instant yeast. Instant yeast works much more quickly and doesn’t require any proofing which makes it ideal for easy bread making.
What is Instant Dry Yeast?
Instant Dry Yeast is very similar to Active Dry Yeast and they can be used interchangeably in the same amounts in recipes. The difference is that Instant Dry Yeast has a smaller granule and doesn’t need to be dissolved in water in order to use in a recipe. It DOES NOT need to proof, meaning it doesn’t have to sit in a warm liquid with sugar in order for it to start growing. It will begin to work in the recipe instantly, cutting down rising time.
Pro Tip: This recipe uses a large amount of yeast to cut rising time as much as possible. If your house is on the colder end, you may want to create a warmer environment for it to proof, or rise. A warm, humid environment between 80 and 90 degrees is ideal for proofing bread. If your house is below 70 to 75 degrees, your rolls will not rise as quickly.
Do I need to proof my bread:
This recipe DOES NOT require you to proof your bread, but it may come in handy during winter months and cooler weather where your house may not be ideal enough for a rapid rise. The rising time, however, may increase beyond 20 minutes if your house runs on the cooler side.
How to Proof Bread:
For a smaller recipe, like this one, you can proof your bread quickly by placing it into a microwave oven alongside a cup of steaming hot water. Keep the door closed and allow the bread dough to rise.
For a larger recipe, or for people with smaller microwaves, you can proof your bread in an oven. Heat your oven to 150 degrees. Turn the oven off and place your dough in the oven and immediately close the door. The initial blast of heat will cause your rolls to rise quickly and the oven will continue to stay in a warmer temperature zone, even as it cools, that is ideal for rapid rising.

Storage Instructions:
Allow your rolls to cool completely before storing in an airtight container at room temperature for up to 5 days.
What can I use in place of honey?
You can also use sugar instead in the same amount.
Thank you for this recipe! I have attempted to make yeast rolls in the past, but I do not have enough patience to make them like my grandmothers use to. I crave their rolls from my childhood. This recipe actually worked for me. They taste great!
Hi All , Really want to make these but only have 1 pckg. Of instant yeast & I noticed It says that it is only 2 1/4 teaspoons and the recipe calls for 1 tablespoon of instant yeast. Would I have to cut down the whole recipe or could I get away with just the flour being cut back ? ? I noticed many recipes are like this would appreciate the help , Thank You very Much . ?
Yeast is fairly forgiving. With 2 1/4 teaspoons you are short 3/4 of a teaspoon of what the recipe calls for. The dough may take slightly longer to rise to the same level.
Should the cast iron be heated first?
Nope!
Just what I was looking for. Enjoyed making and eating them. Vey simple, very tasty recipe. Raised the baking temp about 15 degrees and cooked 5 minutes faster as we are at a high altitude. They came out just right!
This recipe works for me. the video was most helpful and showed me where I had been going wrong when trying to make it by other recipes. My yeast rolls turned out light and fluffy. It was just a little bit of sweet. I am impressed! I will try this again and I do recommend this recipe for others. I am not a baker but I’m trying my hand at it. This is the first successful yeast roll recipe that I have made. Thanks a bunch!
Not sure of the problem but after 40 minutes they still had not risen. This was my first time using instant yeast, sent hubby to the store and he brought back the wrong package. My kitchen was 78 degrees so I know that wasn’t the problem. The dough was incredibly sticky and after an extra 2 oz of flour I was leery to add more. Bad yeast??
Sounds like it. I just made them yesterday and only let them rise for 20 minutes and they still came out fine.
This was my first time making yeast rolls and they turned out great! My dough was a bit sticky and I added another 1/2 cup flour and they made perfect dough balls.
I think I over cooked them just a bit because I didn’t use cast iron I used round cake tins, so I’ll take that into consideration when I make them gain tomorrow.
Twelve rolls and they are all gone with dinner.
This are great in a pinch. Mine took an hour to rise but that’s fine. They are not as light as a kneaded roll but they are just as tasty. Hubby says you can’t beat them with a stick! Meaning he liked! Thanks for the great recipe. A keeper and a time saver.
These are delicious and exactly what I was looking for – a quick rise roll recipe! It took about an hour from start to finish – the rise time took about 40 minutes but wow was it worth it! My husband and I loved them! The only thing we would add next time is a little bit more salt. Other than that, they were perfect! Super fluffy, soft, and moist! Delicious!! Thank you for the recipe!